Bathrooms are areas of privacy, hygiene, and tranquility. It’s strangely relaxing to hear the occasional flow and splash from a running faucet. But beware, as unseen pipe leaks can quickly turn that oasis into an aquatic nightmare.
For homeowners and property managers, understanding the peril that bathroom leaks pose and how to address them swiftly is essential knowledge. In this detailed guide, we’ll walk you through the vital steps to contain and eliminate those sneaky bathroom leaks before they wreak havoc on your property.
1. Pinpoint the Leak Source
Locating the source of a leak is critical. Often, it’s hidden behind walls or under floors. Look for signs of warping, discoloration, or mold. Check fixtures, pipe connections, and seals around the toilet, sink, and shower. Sometimes, the problem might be a worn-out washer or a cracked pipe.
Identifying the leak source can be tricky, so take time to trace where the unnatural movement of water comes from. If necessary, turn the valves or faucets on and off several times to accurately locate the drip source. Identifying the exact point of leakage early can prevent extensive damage and costly repairs.
Depending on the extent of the damage and leak, a shower sealing service may be needed. As an added mitigating measure, you can apply sealing strips or adhesive caulks.
2. Assess the Damage
Once you’ve identified and shut off the leak, it’s crucial to understand the extent of the damage. Water travels, so visible damage could be just the tip of the iceberg. As discussed earlier, check for water stains and structural damage to walls, ceilings, and floors, and identify the leak’s source. This step helps in deciding whether to DIY or call a professional.
Your damage assessment should also include hazard identification. Many would think that there are no electrical hazards when fixing bathroom leaks. While home builders ensure that water pipes and electrical lines don’t intersect, leaks pose the danger of encroaching electrical wirings.
Water and electricity make a dangerous duo. Ensure safety by shutting off electricity in areas affected by leaks. Water conducts electricity, making wet floors and walls potential hazards. Flip the breaker for the bathroom or the affected area to prevent electrical accidents. Always prioritize safety when dealing with water in proximity to electrical outlets and fixtures.
3. Dry the Area
There are several reasons why drying the area affected by leaks is necessary. One is for safety reasons. Aside from electrical hazards, slips and falls due to wet floors are immediate dangers. Reducing the risk of mold growth is another safety reason. Damage mitigation is another reason for drying the area.
This measure serves as a temporary containment of water and moisture accumulation to prevent further water damage and maintain your bathroom’s integrity.
Immediately dry the area surrounding the leak. Place towels, rugs, or buckets under leaking fixtures to catch drips. Also, use waterproof tarps or plastic sheeting to cover and protect exposed areas from water intrusion. If water has accumulated on the floor, use a wet-dry vacuum or mop to remove excess water and prevent it from seeping into flooring materials.
Quick drying also helps in a more accurate assessment of the damage for repairs.
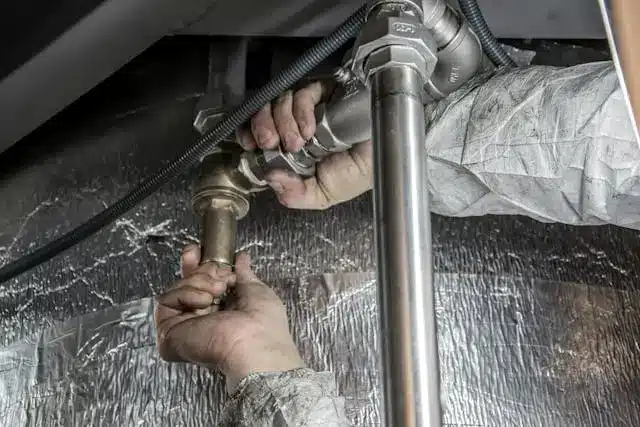
4. Make the Repair
Once the leak’s source is pinpointed and hazards have been removed from the area, proceed with the necessary repairs. Your damage assessment can help you decide whether to repair or replace the affected fixtures or components. For minor issues, such as a leaky faucet or running toilet, DIY fixes involving replacement parts or sealant might suffice.
However, for more complex problems like a broken pipe, it’s advisable to hire a professional plumber.
If your bathroom fixture is affected, consider factors such as the age and condition of the fixture, the extent of the damage, and the cost of repairs versus replacement. This can help you decide whether to repair or replace a leaky fixture. As a rule of thumb, if a fixture is old or showing signs of wear and tear, it may be more cost-effective in the long run to replace it rather than attempt to repair it.
Ensure repairs are thorough to prevent future leaks. After completing the repair, test the area by running water to confirm the leak is fully resolved. Furthermore, make certain that the repair is watertight before fully restoring the water and electricity.
5. Restore the Space
After the repair, it’s time for another round of drying and cleaning, but this time, it’s for restoring your bathroom to its former glory. Cleaning and drying are steps one and two to restoration. From there, you may need to include repainting, replacing damaged drywall or tiles, and ensuring the bathroom is both aesthetically pleasing and functional again.
It’s key to address all water damage thoroughly to avoid future problems. Materials should be moisture-resistant where possible, to mitigate the risk of future leaks. This step, while perhaps seemingly minor, is crucial in returning your bathroom to its pre-leak condition, ensuring the integrity of your home remains intact.
6. Conduct Safety Checks
Before considering the job complete, it’s vital to conduct safety checks. Ensure safety checks are finalized before using the bathroom again. Inspect electrical systems for water damage and test GFCI outlets to confirm they’re functional. Check the structural integrity of floors and walls affected by the leak.
Ensure there’s no water pooling where it shouldn’t be, and double-check there’s no lingering odor of gas or electricity in the air. This final step verifies that the environment is safe and void of hazards, safeguarding against future issues. Safety checks are paramount to conclude the leak remediation process effectively. Finally, keep records of all repairs and checks. It not only provides a history but can be a boon when filing insurance claims.
Dealing with a bathroom leak can be a stressful and frustrating experience, but by following these six important steps, you can effectively manage the situation and minimize damage to your home.
By being attuned to the signs, prepared with the essentials, and confident in taking the right steps, you’ll transform from being at the mercy of bathroom leaks to a vigilant guardian of your household’s watery ways. Remember, a stitch in time saves nine, and in the world of home repairs, a clamp on a pipe could save you a substantial bill on drywall replacement.
Stay alert, stay equipped, and stay leak-free. Your home will thank you.